
2 - Align and crop the image using the MeasureTool, Rotate and CropTool
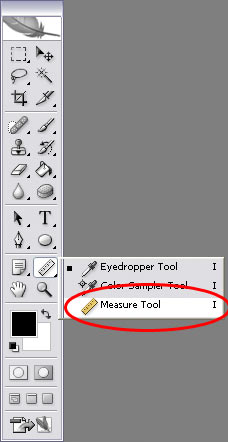
Straightening an image isn't as hard as you might think. First step - find the Measure Tool. If you can't see any of the tools below, go to the Window menu and make sure that Tools is selected. The Measure Tool is an alternative of the eye-dropper, so if you can see the eye-dropper, click and hold to see the alternatives - you want to select the tool that looks like a ruler. Like this:
Next we need to draw along what we think should be the correct horizontal (or vertical) in the image. Start with the furthest edge, click and hold, and then drag until you've reached the other end of the line. In this case we're going to draw along the line formed by the front paws, like so:
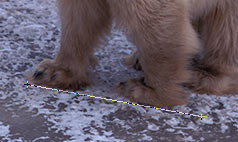
If you're unhappy with your line, just keep trying until you're happy - the first line will disappear as soon as you try and start another :)
Now for the neat bit! Go to the Image menu, select Rotate Canvas, and then Arbitrary... A window like this should appear, with the values magically filled in, like so:
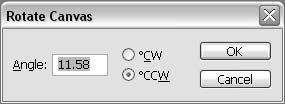
All you have to do is click OK, and the image will be automatically straightened! Like so:
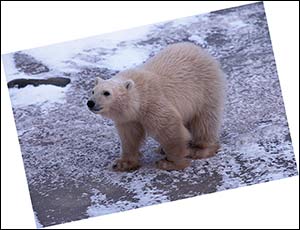
Of course, you've probably noticed a problem - we now have blank areas in the image. So we need to remove those blank parts. To do so, we use the Crop Tool - which looks like this:

After clicking on the Crop Tool, you need to draw a box around the parts of the image we want to keep. This is tricky because it's a matter of looking at the image and working out where to start. I tend to start in the top-left and drag the box out the bottom-right myself. Here's what you should end up with:
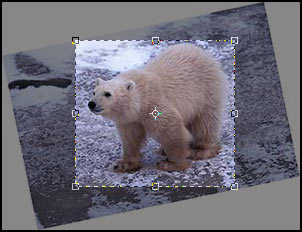
If you need to expand an area, just click and drag one of the squares around the edge. If you're happy with the crop press the Tick in the Options bar, if you want to cancel, press the "circle with a line through it". So - press the tick:

Congratulations! The image has been rotated and cropped, and is now ready for the final stage :)
Next: Page 3: Sharpen and Save the image using SmartSharpen to bring out detail